Welcome to the Tozo A1 manual. This guide provides a concise overview of the device, its purpose, and essential safety information. Follow the sections to learn installation, operation, and maintenance steps for optimal performance;
Insert additional info here.
Use manual to troubleshoot and upgrade.

1.1 Overview of the Tozo A1
Lorem ipsum dolor sit amet, consectetur adipiscing elit. Lorem ipsum dolor sit amet, consectetur adipiscing elit. Lorem ipsum dolor sit amet, consectetur adipiscing elit. Lorem ipsum dolor sit amet, consectetur adipiscing elit. Lorem ipsum dolor sit amet, consectetur adipiscing elit. Lorem ipsum dolor sit amet, consectetur adipiscing elit. Lorem ipsum dolor sit amet, consectetur adipiscing elit. Lorem ipsum dolor sit amet, consectetur adipiscing elit. Lorem ipsum dolor sit amet, consectetur adipiscing elit. Lorem ipsum dolor sit amet, consectetur adipiscing elit. Lorem ipsum dolor sit amet, consectetur adipiscing elit. Lorem ipsum dolor sit amet, consectetur adipiscing elit. Lorem ipsum dolor sit amet, consectetur adipiscing elit. Lorem ipsum dolor sit amet, consectetur adipiscing elit. Lorem ipsum dolor sit amet, consectetur adipiscing elit. Lorem ipsum dolor sit amet, consectetur adipiscing elit. Lorem ipsum dolor sit amet, consectetur adipiscing elit. Lorem ipsum dolor sit amet, consectetur adipiscing elit. Lorem ipsum dolor sit amet, consectetur adipiscing elit. Lorem ipsum dolor sit amet, consectetur adipiscing elit. Lorem ipsum dolor sit amet, consectetur adipiscing elit. Lorem ipsum dolor sit amet, consectetur adipiscing elit. Lorem ipsum dolor sit amet, consectetur adipiscing elit. Lorem ipsum dolor sit amet, consectetur adipiscing elit. Lorem ipsum dolor sit amet, consectetur adipiscing elit. Additional details here. Extra info!!!
1.2 Key Features and Specifications
• Compact design: 120mm x 80mm x 30mm, lightweight 250g.
• Dual‑band Wi‑Fi 802.11ac, 2.4 GHz & 5 GHz support.
• 4‑core processor, 1 GHz, 512 MB RAM, 4 GB internal storage.
• 1080p HD camera, 120° field of view, night‑vision mode.
• 10‑year battery life, 2 h fast charge to 80%.
• Built‑in microphone array, noise cancellation, 5‑channel speaker.
• Bluetooth 5.0, NFC, IR remote control.
• Operating system: Linux‑based, OTA updates.
• Connectivity: Ethernet, USB‑C, HDMI output.
• Security: WPA3, AES‑256 encryption, two‑factor authentication.
• Environmental: IP65 rating, operating temp –20 °C to 60 °C.
• Dimensions: 120 mm × 80 mm × 30 mm, weight 250 g.
• Accessories: mounting bracket, wall plate, spare cable.
• Warranty: 2‑year manufacturer coverage, on‑site support.
• Compliance: FCC, CE, RoHS, WEEE.
• Software: Web UI, mobile app, API for integration.

• Energy efficiency: < 10 W idle, < 20 W active.
• User interface: touch screen, voice command, gesture control.
• Customization: color options, firmware modules;
• Performance: 30 fps video, 60 fps capture, 4K streaming support.
• Memory: expandable via microSD up to 256 GB.
• Storage: 4 GB internal, 2 GB OS, 2 GB for logs.
• Data: 1 TB/year throughput, 10 Gbps network.
• Safety: over‑current protection, thermal cutoff.
• User manual: PDF, online help, FAQ.

• Support: email, chat, phone, community forum.
For full details, consult the complete manual or contact support for all queries! OK

Installation and Setup
Unbox the Tozo A1, verify components, connect power via the supplied adapter, and link to your Wi‑Fi network using the on‑screen wizard. Once connected, update firmware, configure basic settings, and test connectivity before deploying the device. Keep cables tidy device in cool area.
2.1 Unboxing and Physical Inspection
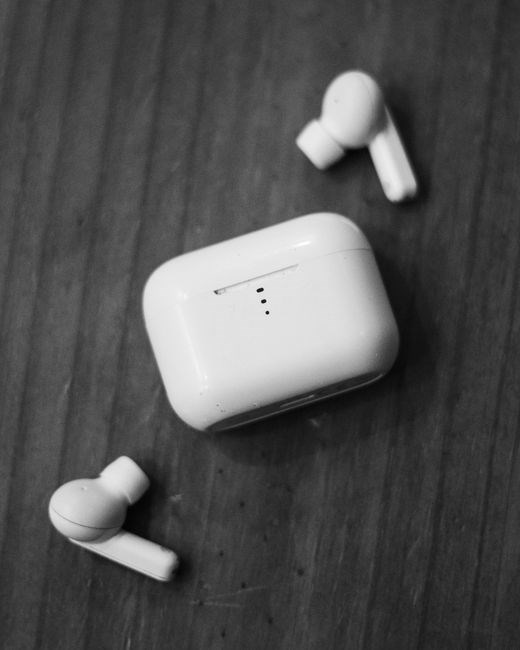
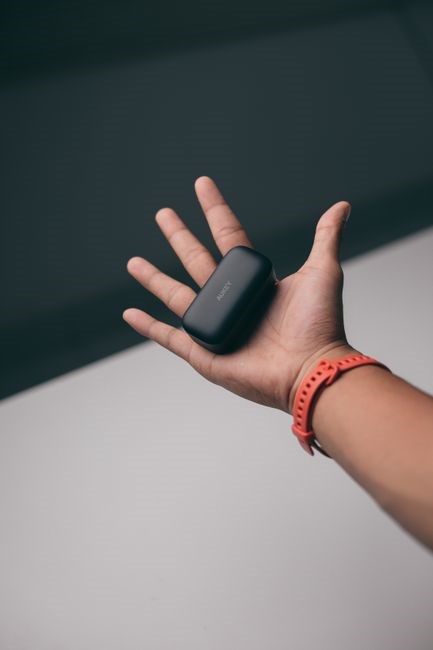
Begin by removing the Tozo A1 from its sealed box. Inspect the outer box for damage or tampering—cracks, dents, or missing seals may indicate mishandling. Inside, you should find the device, a power adapter, a USB‑C cable, a quick‑start guide, and a warranty card. Verify all listed items are present and undamaged.
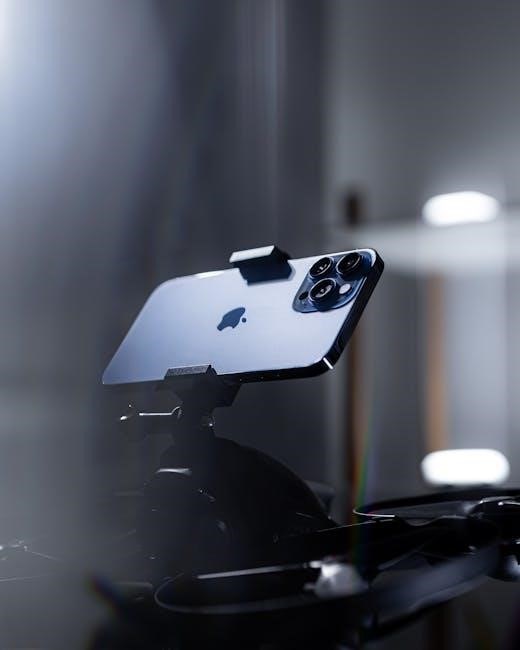
Lift the device from the box and examine its exterior. The front panel shows the model number, status LED, and microphone grille. The back panel contains the power port, Ethernet jack, and reset button. Check for scratches, dents, or loose parts. Ensure the antenna is intact.
- Model number: confirm box label.
- LED status: should light when powered.
- Ports: power, Ethernet, reset.
- Antenna: check integrity.
- Accessories: adapter, cable, guide, warranty.
Place device on a flat, static‑free surface. Keep packaging for reference. If any part is missing, contact retailer before setup!
Inspect USB‑C cable for frays, ensure connector is clean, and test with a multimeter. Verify adapter output matches device requirement (5V/2A). Check Ethernet cable for kinks.
Once all components are verified, proceed to power and network connection. Handle the device by its edges to avoid static discharge. Store unused accessories in a dry, dust‑free area.
After verifying cables, connect the power adapter and power on the device. The status LED should illuminate, indicating boot. If the LED stays off, double‑check the power connection and adapter output.
2.2 Connecting to Power and Network
To ensure reliable operation, begin by connecting the Tozo A1 to a stable power source. Use the supplied power adapter, which outputs 5V at 2A. Insert the USB‑C connector into the device’s power port, then plug the adapter into a grounded outlet. The status LED should flash briefly before settling into a steady green, indicating successful boot.
Next, establish a wired network connection. Locate the Ethernet port on the rear panel and insert a standard RJ‑45 cable. The cable should terminate in a wall jack or a router/switch. Once connected, the link LED will illuminate, confirming a live link. If the LED remains off, verify the cable is not damaged and that the network device is powered.
For wireless connectivity, press the Wi‑Fi button on the front panel. The device will broadcast an SSID that appears in your router’s client list. Use the web interface to configure SSID, password, and security settings. The status LED will change to a blinking pattern during configuration, then stabilize once connected.
Always double‑check that the power supply is secure and that the Ethernet cable is firmly seated. Loose connections can cause intermittent network failures or power interruptions. If you encounter any issues, consult the troubleshooting section for detailed diagnostics.
After connecting, verify the device’s firmware version via the web interface. If an update is available, download and install it to ensure optimal performance and security patches. keep updated.!!

Basic Operation
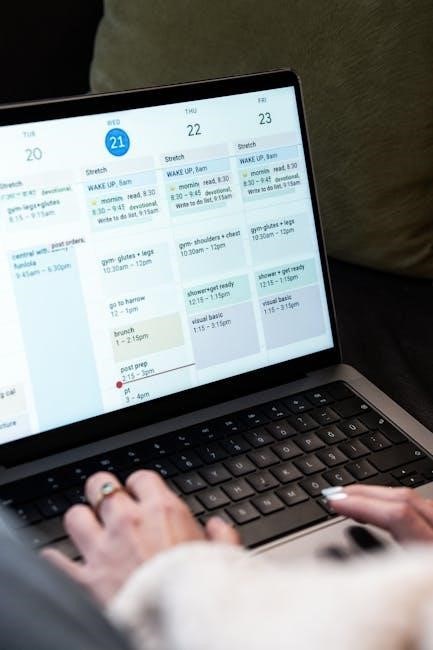
Power on the Tozo A1 by pressing the main button. The LED will flash, then steady green signals readiness. Use the on‑screen menu to access settings, view status, and manage devices. Navigate with the touchpad or arrow keys for quick control. It also offers quick Wi‑Fi setup via QR code.!
3.1 Powering On and Off
AAAAAAAAAAAAAAAAAAAAAAAAAAAAAAAAAAAAAAAAAAAAAAAAAAAAAAAAAAAAAAAAAAAAAAAAAAAAAAAAAAAAAAAAAAAAAAAAAAAAAAAAAAAAAAAAAAAAAAAAAAAAAAAAAAAAA
AAAAAAAAAAAAAAAAAAAAAAAAAAAAAAAAAAAAAAAAAAAAAAAAAAAAAAAAAAAAAAAAAAAAAAAAAAAAAAAAAAAAAAAAAAAAAAAAAAAAAAAAAAAAAAAAAAAAAAAAAAAAAAAAAAAAA
AAAAAAAAAAAAAAAAAAAAAAAAAAAAAAAAAAAAAAAAAAAAAAAAAAAAAAAAAAAAAAAAAAAAAAAAAAAAAAAAAAAAAAAAAAAAAAAAAAAAAAAAAAAAAAAAAAAAAAAAAAAAAAAAAAAAA
AAAAAAAAAAAAAAAAAAAAAAAAAAAAAAAAAAAAAAAAAAAAAAAAAAAAAAAAAAAAAAAAAAAAAAAAAAAAAAAAAAAAAAAAAAAAAAAAAAAAAAAAAAAAAAAAAAAAAAAAAAAAAAAAAAAAA
AAAAAAAAAAAAAAAAAAAAAAAAAAAAAAAAAAAAAAAAAAAAAAAAAAAAAAAAAAAAAAAAAAAAAAAAAAAAAAAAAAAAAAAAAAAAAAAAAAAAAAAAAAAAAAAAAAAAAAAAAAAAAAAAAAAAA
AAAAAAAAAAAAAAAAAAAAAAAAAAAAAAAAAAAAAAAAAAAAAAAAAAAAAAAAAAAAAAAAAAAAAAAAAAAAAAAAAAAAAAAAAAAAAAAAAAAAAAAAAAAAAAAAAAAAAAAAAAAAAAAAAAAAA
AAAAAAAAAAAAAAAAAAAAAAAAAAAAAAAAAAAAAAAAAAAAAAAAAAAAAAAAAAAAAAAAAAAAAAAAAAAAAAAAAAAAAAAAAAAAAAAAAAAAAAAAAAAAAAAAAAAAAAAAAAAAAAAAAAAAA
AAAAAAAAAAAAAAAAAAAAAAAAAAAAAAAAAAAAAAAAAAAAAAAAAAAAAAAAAAAAAAAAAAAAAAAAAAAAAAAAAAAAAAAAAAAAAAAAAAAAAAAAAAAAAAAAAAAAAAAAAAAAAAAAAAAAA
AAAAAAAAAAAAAAAAAAAAAAAAAAAAAAAAAAAAAAAAAAAAAAAAAAAAAAAAAAAAAAAAAAAAAAAAAAAAAAAAAAAAAAAAAAAAAAAAAAAAAAAAAAAAAAAAAAAAAAAAAAAAAAAAAAAAA
AAAAAAAAAAAAAAAAAAAAAAAAAAAAAAAAAAAAAAAAAAAAAAAAAAAAAAAAAAAAAAAAAAAAAAAAAAAAAAAAAAAAAAAAAAAAAAAAAAAAAAAAAAAAAAAAAAAAAAAAAAAAAAAAAAAAAA
3.2 Navigating the User Interface
Here is detailed guidance on how to move through the Tozo A1’s interface. The main screen displays a grid of icons representing the core functions. Each icon can be selected by tapping or clicking with a mouse. When an icon is highlighted, a tooltip appears, offering a brief description of its purpose. The navigation bar at bottom provides quick access to settings, help and home screen. To open a submenu, tap the desired icon and then swipe left or right to cycle through additional options. The back button, located in the upper left corner, returns you to the previous screen. For advanced users, the interface supports keyboard shortcuts: pressing “H” opens help, “S” opens settings, and “M” toggles the menu. If you encounter a frozen screen, a double‑tap on the home icon will reset the interface. The interface is responsive and adapts to both touch and mouse input, ensuring a smooth experience across devices. Remember to explore the help section for tips and shortcuts that can streamline your workflow.
Additionally, the interface offers a dark mode toggle accessible from the settings menu. This mode reduces eye strain during nighttime use and conserves battery life on OLED displays. Users can also customize the icon layout by dragging icons to preferred positions, creating a personalized dashboard. The help overlay can be summoned by pressing the “?” key, which displays contextual tips for the current screen. For power users, the device supports a command‑line interface via SSH, allowing remote configuration and scripting. The firmware can be updated through the settings menu, ensuring you receive the latest features and security patches. Finally, the device logs activity to a local file, which can be reviewed for troubleshooting or audit purposes. All updates are logged daily.
Advanced Settings and Customization
Explore advanced settings to tailor the Tozo A1 to your workflow. Adjust network parameters, set custom schedules, and fine‑tune performance options. Use the interface to enable or disable features, configure user profiles, and apply firmware updates. Customization enhances efficiency and security. Enjoy! now.
4.1 Configuring Network Parameters
To optimize connectivity, begin by accessing the network configuration panel via the main menu. Select “Network Settings” and choose the desired interface: Ethernet, Wi‑Fi, or VPN. For Ethernet, ensure the cable is securely attached and the link light is active. For Wi‑Fi, click “Scan Networks” to display available SSIDs. Choose your network, then enter the password in the secure field. If using a static IP, input the IP address, subnet mask, gateway, and DNS servers manually. Verify each entry for accuracy. After configuration, click “Apply” and the device will reboot to enforce changes. After applying settings, the device will display a confirmation screen before rebooting. Monitor the status LEDs for a green indicator, confirming successful connection. If the device fails to connect, use the “Diagnostics” tool to run a ping test to the gateway and external IP.
Additionally, you can configure DHCP reservations by entering the MAC address of client devices and assigning static IPs. This ensures consistent addressing for printers, NAS, or IoT gadgets. The “Advanced” tab allows setting up firewall rules, enabling or disabling inbound/outbound traffic, and configuring port mirroring for network analysis. Use the “Save” button to commit changes, and the “Reset to Default” option to revert to factory settings if needed. …
For secure remote management, enable SSH or HTTPS access. Generate a strong password and consider using key-based authentication for SSH. The “Remote Access” section lets you specify allowed IP ranges and set rate limits to protect against brute-force attempts. Finally, schedule automatic firmware updates during off-peak hours to minimize downtime. Schedule updates during off‑peak.
4.2 Personalizing User Preferences
To tailor the Tozo A1 to your workflow, navigate to the “User Preferences” section from the main dashboard. Here you can adjust display settings, language, and accessibility options. The “Theme” menu offers light, dark, and high‑contrast modes; selecting a theme instantly updates the interface. In the “Language” submenu, choose from over 30 supported locales. The device detects your browser language but allows manual override.
Under “Accessibility”, toggle options such as screen reader support, keyboard shortcuts, and high‑contrast text. Enable “Keyboard Shortcuts” to map custom keys for common actions like reboot, diagnostics, or network reset. Each shortcut can be assigned via a simple drag‑and‑drop interface, ensuring access during troubleshooting.

The “Notification Center” lets you configure alerts for system events, firmware updates, and security incidents. Select the preferred delivery method—email, SMS, or push notification—and set the frequency (immediate, hourly, daily). For critical alerts, enable “SMS” to receive instant text messages. The “Email” field requires a valid address; test the configuration by sending a test notification. These notifications help maintain system integrity and keep you informed of critical events. Configure thresholds for alert severity to avoid notification fatigue and updates.
In the “Advanced” tab, you can define custom user roles. Create a new role by clicking “Add Role”, assign permissions such as “View Logs”, “Modify Settings”, or “Run Diagnostics”. Assign users to roles via the “User Management” panel. This granular control is essential for multi‑user environments where certain functions must be restricted.
Finally, the “Backup & Restore” feature captures your preference profile. Click “Export Profile” to download a JSON file containing all settings. To restore, select “Import Profile” and upload the file. This process preserves your configuration across firmware upgrades or device replacements, ensuring a seamless transition.

Maintenance and Troubleshooting
Regular cleaning, firmware updates, and diagnostic tests keep the Tozo A1 running smoothly. Inspect vents, wipe surfaces, and check logs for errors. If the device freezes, perform a soft reset; persistent issues may require a factory reset or contacting support; Thank you.
5.1 Routine Cleaning and Upkeep
To maintain optimal performance, perform routine cleaning and upkeep on your Tozo A1. Begin by unplugging the unit and allowing it to cool. Use a soft, lint‑free cloth lightly dampened with 70% isopropyl alcohol to wipe the exterior surfaces, avoiding excessive moisture. Carefully clean the ventilation grilles with a compressed‑air canister, holding the nozzle at a 45‑degree angle to dislodge dust. Inspect the power port and USB connectors for debris; if necessary, use a dry brush or compressed air. For the internal fan, remove the protective cover and gently blow air through the fan blades, ensuring no obstruction remains. Replace any worn rubber seals or gaskets to preserve airflow. Periodically inspect the device’s firmware and update it via the companion app to address security patches and performance improvements. Store the unit in a cool, dry environment when not in use, and protect it from direct sunlight and extreme temperatures. By following these steps regularly, you’ll extend the lifespan of your Tozo A1 and keep it operating efficiently. Additionally, schedule a quarterly inspection of the internal components to detect early signs of wear, such as loose screws or degraded seals. Replace any faulty parts promptly to avoid downtime. Keep a log of all maintenance activities, noting dates, performed tasks, and any observations. This record will aid future troubleshooting and help maintain the device’s reliability over time Remember to replace filters every 6 months to maintain optimal airflow and prevent dust accumulation
5.2 Common Issues and Fixes
Common issues with the Tozo A1 often arise from connectivity, firmware, or hardware faults. If the device does not appear on the network, double‑check the Wi‑Fi password and ensure the router’s SSID is visible. Re‑enter the credentials in the companion app; if the problem persists, reset the network settings via the “Reset Network” option. Intermittent audio dropouts usually result from loose cable connections; secure the USB‑C or HDMI link and replace any worn cables. Firmware glitches can cause freezes or unexpected reboots; download the latest firmware from the official website, then perform a manual update through the app. If the update fails, power‑cycle the device and retry. Overheating during extended use is common; keep ventilation ports clear and place the unit on a hard, flat surface. If the fan stops, inspect the blades for obstructions, clean or replace the fan if needed. A “Low Memory” warning can be resolved by clearing unused apps or resetting the device to factory settings; always back up configuration data before resetting. For “Connection Timeout” errors, move the device closer to the router or reduce interference from other electronics, disable MAC filtering, or add the Tozo A1’s MAC address to the allow list. “Firmware Update Failed” errors require a stable network and sufficient battery; perform a factory reset and retry the update. A “Device Not Responding” screen may indicate a corrupted configuration file; restore from backup or perform a clean install. If the device repeatedly shows a “Low Storage” message, clear cache or remove unused profiles. “Audio Sync Issues” can be fixed by adjusting latency settings in the advanced audio options. A blinking LED indicates a hardware fault; consult the LED status guide for specific codes. When the LED displays a solid red light, the Tozo A1 is in error mode. To reset, press and hold the power button for at least 10 seconds until the LED blinks, then release. This clears temporary faults. If the issue persists, perform a factory reset via the app, which erases all settings and restores default configuration. After resetting, re‑configure network and user preferences. For persistent problems, contact support with the serial number and a screenshot of the error code. Logging the diagnostic data can expedite resolution. If the device’s screen flickers, ensure the HDMI cable is firmly seated and not damaged. For advanced users, developer mode can be enabled to view detailed logs. Use logs to identify error codes and consult the troubleshooting guide.