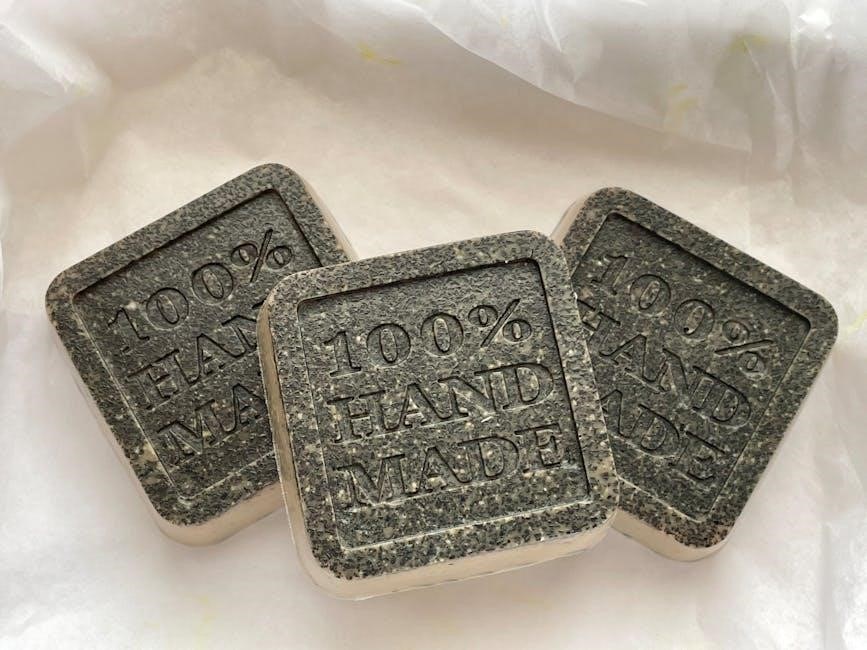
Category: Instructions

interview questions instructional coach

An instructional coach supports teachers in enhancing instructional practices to improve student outcomes. Coaches act as mentors‚ providing resources and professional development opportunities to educators. This role combines leadership‚ collaboration‚ and data-driven strategies to foster continuous improvement in teaching and learning environments.

Coaches work closely with teachers to identify areas for growth and implement evidence-based practices. Their ultimate goal is to empower educators‚ ensuring they have the tools and confidence needed to create impactful learning experiences for all students.

What is your understanding of the role of an instructional coach?

An instructional coach is a professional who works collaboratively with teachers to enhance teaching practices and improve student learning outcomes. The role involves providing personalized support‚ sharing evidence-based strategies‚ and fostering a culture of continuous improvement. Coaches act as mentors‚ offering guidance on curriculum design‚ instructional techniques‚ and data-driven decision-making. They facilitate professional development opportunities and encourage reflective practice among educators. Additionally‚ instructional coaches often help teachers analyze student performance data to identify areas of strength and improvement. Their goal is to empower teachers with the tools‚ confidence‚ and knowledge needed to create engaging and effective learning environments. By building trust and fostering collaboration‚ instructional coaches play a pivotal role in advancing educational excellence and supporting the growth of both educators and students.

Ultimately‚ the role is about enabling teachers to excel in their profession‚ which in turn benefits students and the broader school community.

Why do you want to be an instructional coach?

I am passionate about education and dedicated to helping teachers grow professionally. Becoming an instructional coach allows me to make a broader impact by supporting educators in improving their practices‚ which ultimately benefits students. I find joy in collaborating with teachers‚ sharing strategies‚ and helping them overcome challenges. This role aligns with my commitment to fostering a culture of continuous improvement and lifelong learning. I am motivated by the opportunity to empower educators‚ as their growth directly enhances student outcomes. Coaching enables me to contribute to the educational community in a meaningful way‚ combining my teaching experience with leadership skills to drive positive change.

Seeing teachers succeed and knowing that their students will thrive as a result is incredibly fulfilling. This role is a natural progression of my dedication to education and my desire to make a lasting difference.

What challenges do you anticipate in this role‚ and how would you address them?

As an instructional coach‚ I anticipate challenges such as resistance to change‚ varying teacher readiness for professional development‚ and balancing multiple responsibilities; To address these‚ I would build trust through active listening and demonstrating my commitment to supporting teachers. I would also offer personalized coaching tailored to individual needs‚ fostering a collaborative environment where teachers feel comfortable seeking help. Additionally‚ I would communicate clearly about the benefits of new strategies and involve teachers in the decision-making process to encourage buy-in. By staying organized‚ prioritizing tasks‚ and leveraging data to inform my approaches‚ I would manage my workload effectively while maintaining a focus on student-centered outcomes.

Ultimately‚ my goal is to create a supportive and inclusive culture that encourages continuous improvement and shared success.

Teaching and Leadership Experience

My extensive teaching and leadership experience has equipped me with the skills to support educators effectively. I have led professional development workshops‚ mentored new teachers‚ and implemented school-wide initiatives to enhance teaching practices.

Can you describe your teaching experience and how it prepares you for this role?

My teaching experience spans over a decade‚ during which I have worked with diverse student populations and developed a deep understanding of effective instructional strategies. I have taught various grade levels and subjects‚ which has honed my ability to adapt to different learning needs and create engaging lessons. This experience has also taught me the importance of building strong relationships with students‚ parents‚ and colleagues.

As a teacher‚ I consistently used data to inform my instruction‚ monitored student progress‚ and implemented interventions to address gaps in learning. These skills are directly transferable to the role of an instructional coach‚ where I can support teachers in analyzing data‚ refining their practices‚ and fostering a growth mindset in their classrooms. Additionally‚ my experience in mentoring new teachers and leading professional development workshops has prepared me to coach educators effectively‚ helping them enhance their teaching strategies and improve student outcomes.

How have you previously supported other educators in their professional development?

Throughout my career‚ I have actively supported educators in their professional growth by mentoring new teachers‚ leading professional development workshops‚ and facilitating collaborative planning sessions. As a mentor‚ I provided one-on-one coaching‚ offering feedback on lesson plans and instructional strategies. I also organized school-wide workshops on topics such as differentiated instruction and technology integration‚ which helped educators enhance their teaching practices.

In addition‚ I facilitated professional learning communities (PLCs) where teachers collaborated to share best practices‚ analyze student data‚ and develop targeted interventions. By fostering a culture of continuous improvement‚ I empowered educators to reflect on their practices and implement changes that positively impacted student learning. These experiences have prepared me to support teachers effectively in their professional development as an instructional coach.

What leadership roles have you held‚ and how have they shaped your approach to coaching?

During my career‚ I have served as a department chair‚ grade-level team leader‚ and curriculum development committee member. These roles have honed my ability to lead collaboratively‚ communicate effectively‚ and empower others. As a department chair‚ I facilitated meetings‚ set goals‚ and managed budgets‚ which taught me the importance of organization and clear vision.

These leadership experiences have shaped my coaching approach by emphasizing the value of building trust‚ active listening‚ and fostering collaboration. I learned to create a supportive environment where educators feel comfortable taking risks and seeking feedback. My leadership roles also taught me to approach challenges with a solutions-oriented mindset‚ which I now apply to help teachers overcome obstacles and grow professionally.

Data-Driven Instruction

Data-driven instruction involves using assessment results‚ progress monitoring‚ and student performance metrics to guide teaching strategies. Coaches help teachers analyze these insights to make informed decisions‚ ensuring targeted support and improved student outcomes.

What types of data do you find most useful for guiding instruction?

Formative and summative assessment data are invaluable for guiding instruction‚ as they provide insights into student progress and understanding. Standardized test scores offer a broader perspective on student performance‚ while progress monitoring data helps track growth over time. Additionally‚ classroom observation notes and teacher feedback can provide qualitative insights. I also find value in analyzing student work samples and performance tasks‚ as they reveal application of skills. By synthesizing these data types‚ coaches can identify patterns‚ pinpoint areas for improvement‚ and inform coaching strategies that address specific student needs. This balanced approach ensures that instruction is tailored‚ impactful‚ and aligned with learning goals.

How do you assist teachers in using assessment data to improve student outcomes?

To help teachers effectively use assessment data‚ I start by collaboratively analyzing the data to identify trends‚ strengths‚ and areas for improvement. I work with teachers to set specific‚ measurable goals for student growth and develop targeted instructional strategies. Providing professional development on how to interpret and apply data is crucial‚ ensuring teachers feel confident in using it to inform their instruction. I also offer resources and tools‚ such as data visualization templates or progress monitoring charts‚ to make data analysis more accessible. Additionally‚ I facilitate regular check-ins to review student progress and adjust teaching methods as needed. By fostering a data-driven mindset and offering ongoing support‚ I empower teachers to make informed decisions that directly impact student success and achievement.

Can you provide an example of how you’ve used data to inform coaching strategies?

In one instance‚ I analyzed student performance data from a reading assessment‚ which revealed that a significant number of students were struggling with comprehension skills. I shared these findings with the teacher and collaboratively identified areas where instructional strategies could be adjusted. Together‚ we developed a coaching plan that included modeling targeted reading comprehension techniques‚ such as think-alouds and graphic organizers. I also provided the teacher with resources for differentiated instruction and conducted follow-up coaching cycles to monitor progress. By using the data to pinpoint specific needs‚ we were able to implement tailored strategies that resulted in a noticeable improvement in student performance on subsequent assessments. This experience highlighted the power of data-driven decision-making in coaching and its positive impact on student outcomes.

Instructional Strategies

Effective instructional strategies engage students‚ promote active learning‚ and cater to diverse needs. Coaches help teachers implement evidence-based methods‚ fostering innovation and improving student outcomes through tailored approaches.

What instructional strategies do you believe are most effective‚ and why?

The most effective instructional strategies are those that promote active learning‚ differentiation‚ and engagement. Strategies like project-based learning‚ formative assessments‚ and technology integration are particularly impactful. Project-based learning encourages critical thinking and real-world application‚ while formative assessments allow for timely feedback and adjustments. Technology integration enhances accessibility and engagement‚ making learning interactive and relevant. Differentiated instruction ensures that all learners’ needs are met‚ regardless of ability or background. These strategies foster a student-centered approach‚ encourage collaboration‚ and support deeper understanding. They are effective because they address diverse learning styles‚ promote equity‚ and prepare students for future challenges. By incorporating these strategies‚ educators can create dynamic‚ inclusive learning environments that drive meaningful outcomes.

How do you help teachers implement new teaching methods?

Helping teachers implement new teaching methods begins with building trust and collaboration. I start by understanding their current practices and identifying areas where new methods could enhance student learning. I then provide professional development opportunities‚ such as workshops or one-on-one coaching‚ to introduce the strategies. Modeling lessons and co-teaching are effective ways to demonstrate new techniques in real-time. Additionally‚ I offer resources like lesson plans‚ research‚ and tools to support their implementation. Ongoing feedback and encouragement are crucial to help teachers feel confident and motivated. I also facilitate peer collaboration‚ allowing teachers to share experiences and best practices. By creating a supportive environment and providing practical support‚ I empower teachers to successfully integrate innovative methods into their classrooms‚ leading to improved instruction and student outcomes.

What role do you think technology plays in enhancing instruction?

Technology plays a pivotal role in enhancing instruction by providing teachers and students with innovative tools and resources. It allows for personalized learning experiences‚ enabling teachers to tailor instruction to meet individual student needs. Digital platforms and educational software offer interactive and engaging ways to present content‚ increasing student motivation and understanding. Technology also facilitates access to a wealth of information‚ promoting critical thinking and research skills. Additionally‚ it supports data-driven decision-making‚ allowing teachers to track student progress and adjust instruction accordingly. Tools like learning management systems and collaboration platforms enhance communication and teamwork among students and educators. Overall‚ technology serves as a powerful catalyst for modernizing education‚ making it more dynamic‚ inclusive‚ and effective in preparing students for the future.

Communication and Collaboration

Effective communication and collaboration are essential for fostering a supportive learning environment. Building trust through active listening and open dialogue ensures productive partnerships with teachers and stakeholders.

How do you build trust and rapport with teachers?

Building trust and rapport with teachers is foundational to effective instructional coaching. I prioritize active listening‚ empathy‚ and open communication to create a safe and supportive environment. By acknowledging teachers’ expertise and experiences‚ I foster mutual respect and collaboration. Consistency in my actions and following through on commitments reinforce credibility. I also focus on shared goals‚ involving teachers in decision-making processes to ensure alignment and ownership. Cultural responsiveness is key‚ as I strive to understand and respect diverse backgrounds and teaching styles. Through these approaches‚ I establish strong‚ trusting relationships that facilitate growth and partnership.

Can you describe your approach to effective communication in a coaching relationship?

My approach to effective communication in a coaching relationship is rooted in clarity‚ empathy‚ and active listening. I prioritize creating a collaborative dialogue where teachers feel heard and valued. I use open-ended questions to encourage reflection and deeper thinking‚ while also providing specific‚ actionable feedback. Non-verbal cues‚ such as maintaining eye contact and nodding‚ help build connection and show engagement. I adapt my communication style to meet the needs of individual teachers‚ whether through informal check-ins‚ structured meetings‚ or written follow-ups. Regularly seeking feedback ensures that my communication is impactful and aligned with their goals. By fostering a transparent and supportive exchange‚ I establish a strong foundation for professional growth and collaboration.

How do you facilitate collaboration among teachers?

Fostering collaboration among teachers is essential for creating a cohesive and supportive educational environment. I facilitate collaboration by encouraging open communication and mutual respect. I organize regular professional learning communities (PLCs) where teachers can share strategies‚ discuss challenges‚ and align practices. By promoting a growth mindset‚ I help teachers view collaboration as a way to enhance student outcomes. I also act as a connector‚ identifying common interests or goals among staff and pairing them for joint projects. Providing structured time for collaborative planning and ensuring active listening are key to building trust. I encourage teachers to observe each other’s classrooms and provide feedback‚ which strengthens teamwork and innovation. Celebrating successes and addressing conflicts constructively further nurture a collaborative culture. Ultimately‚ my role is to empower teachers to work together effectively‚ leveraging their collective expertise to benefit all students.

Professional Development

Professional development opportunities include workshops‚ mentoring programs‚ and peer observations. These activities are aligned with school goals and teacher needs‚ fostering continuous improvement and enhancing instructional strategies effectively.

What professional development opportunities would you recommend for teachers?

To support teacher growth‚ I recommend professional development opportunities such as workshops‚ mentoring programs‚ and peer observations. These activities should focus on evidence-based practices‚ technology integration‚ and culturally responsive teaching. Additionally‚ offering opportunities for teachers to attend conferences‚ engage in collaborative planning‚ and participate in coaching cycles can enhance their skills. Providing time for self-directed learning‚ such as online courses or book studies‚ allows teachers to pursue areas of personal interest. Tailoring professional development to address school-specific needs ensures relevance and impact. By aligning these opportunities with teacher goals and student needs‚ educators can develop the skills and confidence to improve instructional practices and student outcomes effectively.

How do you stay current with best practices in education?

To stay current with best practices in education‚ I engage in ongoing professional learning through various channels. I regularly read educational journals‚ such as Educational Leadership and Teaching Tolerance‚ to stay informed about research-based strategies. I also attend conferences‚ workshops‚ and webinars‚ such as those offered by ASCD or EdSurge‚ to learn from experts and network with educators; Additionally‚ I participate in online communities and forums‚ like Edutopia and Twitter chats (e.g.‚ #EdChat)‚ to share ideas and gain insights from practitioners. I collaborate with colleagues through professional learning communities (PLCs) and book studies to explore innovative teaching methods. Finally‚ I subscribe to educational blogs and podcasts‚ such as Cult of Pedagogy and The EdPod‚ to stay updated on trending topics and evidence-based practices in real time.

How do you assess the professional development needs of a school or district?

To assess professional development needs‚ I collaborate with school leaders and teachers to identify gaps and priorities. I review student performance data‚ classroom observation findings‚ and teacher feedback to pinpoint areas for improvement. Conducting surveys and focus groups with educators helps uncover their specific challenges and interests. Additionally‚ I analyze the school’s or district’s strategic goals and compare them with current instructional practices. This comprehensive approach ensures that professional development opportunities are targeted‚ relevant‚ and aligned with both teacher needs and organizational objectives. By involving stakeholders in the process‚ I foster a culture of continuous improvement and ensure that PD initiatives are impactful and sustainable.

Problem-Solving Scenarios

This section explores real-world challenges in education‚ offering practical solutions and strategies for addressing common issues faced by instructional coaches‚ teachers‚ and school leaders.

Tell me about a time you helped a teacher overcome a specific challenge.

In one instance‚ a teacher was struggling with classroom management‚ particularly with engaging students during lessons. I observed the classroom and identified that the lack of interactive activities and differentiation in instruction were key issues. I collaborated with the teacher to design lesson plans incorporating hands-on tasks and technology integration. Additionally‚ I facilitated a professional development session on differentiated instruction. Over time‚ classroom engagement improved‚ and the teacher reported better student behavior and academic performance. This experience highlighted the importance of tailored support and collaborative problem-solving in coaching.

How would you handle resistance from a teacher who is hesitant to change their methods?

When encountering resistance from a teacher hesitant to change‚ I prioritize building trust and understanding their perspective. I start by actively listening to their concerns and acknowledging the effort they’ve already invested in their teaching practices. This helps establish a safe and respectful environment for dialogue. Next‚ I collaboratively explore the reasons behind their hesitation‚ whether it’s fear of failure‚ lack of confidence‚ or skepticism about the new method. Together‚ we set small‚ achievable goals and identify incremental steps for implementation. I also offer support‚ such as modeling lessons‚ providing resources‚ or co-teaching to reduce anxiety. By focusing on the benefits for student learning and celebrating progress‚ I help the teacher see the value in change. Patience and empathy are key to fostering a growth mindset and encouraging gradual shifts in practice.

Describe a situation where you had to mediate a conflict between teachers.

In one instance‚ two teachers disagreed on classroom management strategies‚ leading to tension. I scheduled a private meeting with both to understand their perspectives. By actively listening and acknowledging their concerns‚ I created a neutral space for open dialogue. I guided them to focus on shared goals—student success and a positive school environment. Together‚ we brainstormed a compromise that blended their approaches. I encouraged collaboration and mutual respect‚ helping them see the value in diverse methods. Over time‚ they developed a more cohesive strategy‚ improving their working relationship. This experience reinforced the importance of empathy‚ active listening‚ and fostering collaboration in resolving conflicts effectively.

Cultural Responsiveness and Equity

Culturally responsive coaching involves understanding and valuing diverse backgrounds. I promote equity by addressing biases‚ ensuring inclusive practices‚ and supporting teachers in meeting all students’ unique needs effectively.

How do you ensure that your coaching practices are culturally responsive?

To ensure culturally responsive coaching‚ I prioritize understanding the diverse backgrounds and experiences of both teachers and students. I engage in ongoing professional development to deepen my knowledge of culturally responsive practices. By actively listening to teachers’ perspectives and incorporating student data‚ I tailor my coaching strategies to meet the unique needs of each classroom. I also encourage teachers to reflect on their own biases and promote the use of inclusive materials. Building trust through empathy and respect is central to my approach. Additionally‚ I collaborate with teachers to create learning environments that value diversity and foster equity. This includes providing resources and strategies that address the cultural and linguistic diversity of students‚ ensuring all learners feel seen and supported. Continuous self-reflection and a commitment to equity guide my coaching practices.

What strategies do you use to promote equity in education?

Promoting equity in education requires intentional strategies to ensure all students have access to opportunities for success; I start by analyzing data to identify disparities in student outcomes‚ then work with teachers to develop targeted interventions. Differentiated instruction is a key strategy‚ ensuring that lessons meet the needs of diverse learners. I also advocate for culturally responsive materials and inclusive practices that reflect students’ backgrounds. Professional development focused on implicit bias and equity helps educators recognize and address systemic barriers. Additionally‚ I encourage teachers to build strong relationships with students and families‚ fostering a sense of belonging. By addressing the root causes of inequities and providing tailored support‚ I help create learning environments where every student can thrive. Equity is not just a goal but a commitment that guides every aspect of my coaching practice.

How do you support teachers in addressing the diverse needs of their students?

To support teachers in addressing diverse student needs‚ I collaborate with them to design differentiated instruction tailored to various learning styles‚ abilities‚ and cultural backgrounds. I provide resources and training on strategies such as Universal Design for Learning (UDL) and scaffolding techniques to ensure accessibility. Encouraging the use of formative assessments helps teachers identify individual student needs and adjust instruction accordingly. I also model inclusive practices‚ such as incorporating diverse texts and materials‚ and assist in creating flexible grouping strategies. Additionally‚ I help teachers integrate technology tools that personalize learning experiences. By offering coaching cycles focused on specific student needs and providing feedback‚ I empower teachers to create equitable and engaging classrooms. My goal is to ensure every student feels valued and has the support necessary to succeed.

bosch washing machine instruction manual

Bosch Washing Machine Instruction Manual⁚ A Comprehensive Guide

This manual provides comprehensive instructions for your Bosch washing machine. It covers pre-wash preparation, cycle selection, troubleshooting, maintenance, safety, and contacting Bosch support. Find model-specific details and helpful tips for optimal performance and longevity; Download additional resources online.

Finding Your Model Number (E-Nr)

Locating your Bosch washing machine’s model number, or E-Nr, is crucial for accessing the correct instruction manual and obtaining support. This alphanumeric code, typically found on a sticker or plate affixed to the appliance, uniquely identifies your specific model. The E-Nr usually begins with three letters followed by a combination of numbers and letters, concluding with a forward slash and two additional numbers (e.g., WAY12345/01). To find this information, carefully examine the appliance’s exterior. Common locations include the inside of the door, the top edge of the machine, or the back panel. Take a clear photograph of the rating plate if you have difficulty reading the information directly. If you cannot find the E-Nr on the appliance itself, refer to your purchase documentation or contact Bosch customer service for assistance. Having your E-Nr readily available ensures efficient access to support resources and simplifies the troubleshooting process.

Locating the Instruction Manual Online

Accessing your Bosch washing machine’s instruction manual online is straightforward. Begin by visiting the official Bosch website for your region; Navigate to their customer support or service section. Look for a search bar or a link specifically for finding manuals or user guides. You’ll likely be prompted to enter your appliance’s model number (E-Nr). This number, a unique alphanumeric code, is essential for locating the correct manual. Once you’ve entered the E-Nr, the website should display a list of available documents for your specific model. Select the instruction manual, which is usually a PDF file. You can then download this document to your computer or mobile device for easy access. Alternatively, some websites allow you to view the manual online without downloading, providing a convenient way to find specific instructions or troubleshooting steps. Remember to have your E-Nr readily available to expedite the process. If you experience difficulties finding the manual online, contact Bosch customer support for assistance.

Understanding Key Washing Machine Features

Bosch washing machines offer a range of innovative features designed for efficient and effective laundry care. Many models include multiple wash cycles catering to various fabric types and levels of soiling. Options like pre-wash, delicate, and intensive cycles allow for customized cleaning. Variable spin speeds enable you to control water extraction, reducing drying time and minimizing wrinkles. Sensor technology in some models automatically adjusts water levels based on load size, conserving water and energy. Delay start timers offer flexibility, allowing you to schedule washes for off-peak hours. Integrated displays provide clear feedback on selected settings and cycle progress. Some advanced models include features like steam cleaning for enhanced stain removal or allergy programs designed to reduce allergens in laundry. Understanding these features allows you to optimize your washing machine’s performance and achieve the best results for your laundry. Refer to your specific model’s manual for detailed information on its unique capabilities and how to utilize them effectively.

Pre-Wash Preparation⁚ Sorting Laundry and Detergents

Proper pre-wash preparation is crucial for optimal cleaning and to protect your Bosch washing machine. Begin by sorting laundry into separate piles based on fabric type (whites, lights, darks, delicates), color, and soil level. Check garment care labels for specific washing instructions and any restrictions. Empty pockets to prevent damage to the machine and other clothing. Repair any loose buttons or tears before washing. For heavily soiled items, pre-treat stains with a suitable stain remover. Select the appropriate detergent for your laundry type and water hardness. Use the recommended amount of detergent; using too much can cause excessive suds and residue, while too little may result in insufficient cleaning. Liquid detergents are typically added directly to the dispenser, while powder detergents are usually placed in the designated compartment. Consider using fabric softener for added softness and static reduction, following the machine’s instructions for correct placement. Always refer to your Bosch washing machine’s instruction manual for specific guidance on detergent type, quantity, and placement for optimal wash results and machine care.

Selecting the Appropriate Wash Cycle

Choosing the correct wash cycle is essential for effective cleaning and fabric care. Your Bosch washing machine offers a variety of cycles designed for different fabric types and soil levels. Before selecting a cycle, carefully examine the care labels on your garments for specific washing instructions. For everyday items like cotton shirts and jeans, a standard or cotton cycle is usually suitable. Delicate items such as silk or lace require a delicate or hand wash cycle with a lower spin speed to prevent damage. Heavily soiled items may benefit from a pre-wash option or a longer wash cycle. If you’re unsure which cycle to use, consult your Bosch washing machine’s instruction manual for detailed descriptions of each cycle and its corresponding settings. Consider factors such as water temperature, spin speed, and wash time when making your selection. Higher water temperatures are generally better for sanitizing and removing stubborn stains, but they may not be suitable for all fabrics. Adjust the spin speed according to the fabric type; higher spin speeds remove more water, reducing drying time, but can also cause wrinkles. Remember that selecting the appropriate cycle ensures optimal cleaning while protecting your clothes and extending the life of your washing machine.

Troubleshooting Common Issues

Encountering problems with your Bosch washing machine? This section guides you through common issues and their solutions. A machine that won’t start might have a power supply problem; check the outlet and circuit breaker. If the machine is making unusual noises, inspect for any foreign objects lodged inside, ensuring all clothing items are properly loaded. Excessive vibration could indicate an imbalance; redistribute the laundry evenly. Water leaks often stem from hose connections; tighten all connections securely. If the clothes aren’t clean, ensure you’ve selected the appropriate wash cycle and used the correct amount of detergent. Refer to the detergent guidelines in your manual. For persistent issues, check the filter for blockages. A clogged filter can restrict water flow and lead to inefficient washing. If the machine displays error codes, consult your instruction manual for a detailed explanation of the error and recommended steps to resolve it. Remember, preventative maintenance, such as regularly cleaning the filter and inspecting hoses, can significantly reduce the occurrence of these problems. If you are still experiencing difficulties after trying these steps, contact Bosch customer service for further assistance.

Maintenance and Cleaning

Regular maintenance ensures your Bosch washing machine operates efficiently and extends its lifespan. Clean the detergent dispenser regularly to prevent detergent buildup. Remove any residue with a soft brush and warm water. The filter should be inspected and cleaned at least every three months or more frequently if you notice reduced water drainage. Locate the filter, usually at the bottom front of the machine, and carefully remove it. Clean any debris or lint from the filter using a soft brush and running water. Remember to place a container underneath to catch any residual water. The exterior of the machine should be wiped down with a damp cloth and a mild detergent. Avoid abrasive cleaners or harsh chemicals that could damage the finish. Inspect the water supply hoses periodically for any signs of wear and tear, such as cracks or leaks. Replace them immediately if any damage is observed. Check the door seal for any debris or mold. Wipe it clean with a damp cloth and mild detergent. Proper maintenance practices minimize the chances of malfunctions and keep your machine running smoothly. Regular cleaning prevents the buildup of dirt, detergent residue, and mold which can impact performance and potentially cause damage. Following these simple maintenance steps will ensure your Bosch washing machine provides years of reliable service.

Understanding the Control Panel and Display

Your Bosch washing machine’s control panel provides intuitive access to various settings and functions. Familiarize yourself with the layout and symbols to operate your machine effectively. The display usually shows the selected wash cycle, remaining time, and any error codes. Common controls include buttons for selecting wash programs, adjusting temperature, spin speed, and additional options such as pre-wash or extra rinse. Some models may feature a dial or rotary selector for choosing wash cycles. The display often indicates the current stage of the wash cycle, such as filling, washing, rinsing, or spinning. Understanding these indicators allows you to monitor the washing process and identify any potential issues. Consult your specific model’s instruction manual for detailed explanations of each button and symbol. Many models offer advanced features like delay start, allowing you to program the washing machine to start at a later time. Others may include options for specific fabric types, such as delicate or wool cycles. Mastering your control panel ensures you can utilize your Bosch washing machine’s full capabilities and achieve optimal cleaning results for your laundry.

Safety Precautions and Warnings

Before using your Bosch washing machine, carefully review these safety precautions. Ensure proper ventilation around the appliance to prevent overheating. Never operate the machine if the power cord is damaged or frayed. Always unplug the machine before performing any maintenance or cleaning. Keep children away from the appliance during operation. Do not overload the washing machine beyond its maximum capacity; this can cause damage and imbalance. Never force the door open while the machine is running. Only use detergents and cleaning agents specifically designed for washing machines. Avoid using excessive amounts of detergent, as this can lead to residue buildup and damage to the appliance. Be cautious when handling hot water during the draining process. Always ensure the appliance is properly leveled to prevent vibrations and noise during operation. Inspect the water supply hoses regularly for leaks or damage. If you notice any issues, immediately turn off the water supply and contact Bosch customer service. Regularly inspect and clean the lint filter and drain pump to prevent clogs and ensure optimal performance. Never attempt repairs yourself unless you are qualified to do so; contact a qualified technician for any repairs or maintenance that is beyond your capabilities. Following these precautions will help ensure the safe and efficient operation of your Bosch washing machine;

Contacting Bosch Customer Service

Should you encounter any issues with your Bosch washing machine that you cannot resolve using the troubleshooting guide in this manual, or if you require further assistance with maintenance, repairs, or parts, Bosch offers comprehensive customer support. You can find contact information, including phone numbers and email addresses, on the official Bosch website. Their website also provides access to a detailed FAQ section, online troubleshooting tools, and a searchable database of manuals and guides for various Bosch appliance models. For faster service, have your appliance’s model number (E-Nr) readily available when contacting Bosch customer service. This number can typically be found on a sticker located on the inside of the appliance door or on the back of the machine. Bosch technicians and authorized service providers are trained on Bosch engineering and provide friendly, efficient service. They can offer expert advice, answer your questions about use and care, and provide guidance on troubleshooting minor problems or scheduling repairs. Complete documentation is available for all Bosch products, including valuable information about maintenance, spare parts, and dealing with common issues. Remember to consult your user manual first for basic troubleshooting steps before contacting customer support.

failure to follow instructions

Failure to Follow Instructions⁚ Workplace Consequences

Ignoring instructions leads to disciplinary actions, impacting performance reviews and potentially resulting in termination․

Consistent non-compliance hinders career progression, limiting opportunities for promotions and raises․

Disciplinary Actions and Performance Reviews

Failure to follow instructions in the workplace can trigger a range of disciplinary actions, starting with verbal warnings and progressing to written reprimands․ These actions are formally documented and become part of an employee’s permanent record․ Subsequent infractions may lead to suspension without pay, and ultimately, termination of employment․ Performance reviews directly reflect an employee’s adherence to instructions․ Consistent non-compliance will result in negative evaluations, impacting future opportunities for bonuses, raises, and promotions․ Managers are obligated to document instances of non-compliance, providing specific examples and detailing the consequences of such actions․ This documentation serves as evidence in disciplinary proceedings and provides a clear record of performance issues․

Impact on Career Advancement

A consistent pattern of failing to follow instructions significantly hinders career advancement․ Opportunities for promotions often require demonstrating reliability and competence, including a proven ability to follow procedures and directives․ Negative performance reviews stemming from non-compliance directly impact an employee’s eligibility for advancement․ Supervisors and management often consider an individual’s history of following instructions when making decisions about promotions and raises․ Individuals with a track record of insubordination or consistent disregard for instructions are viewed as less reliable and less likely to be entrusted with increased responsibility․ This can lead to stagnation in career progression, limiting opportunities for growth and higher earning potential within the organization․ Furthermore, a reputation for not following instructions can negatively affect future job prospects, making it more difficult to secure positions in other companies․

Failure to Follow Instructions⁚ Educational Settings

Ignoring instructions in education impedes learning, hinders skill development, and negatively impacts academic success․

Impact on Learning and Development

In educational settings, the ability to follow instructions is fundamental to acquiring knowledge and developing essential skills․ Failure to adhere to instructions directly impacts a student’s capacity to grasp complex concepts, complete assignments effectively, and participate meaningfully in classroom activities․ When students disregard instructions, they miss crucial steps in the learning process, leading to incomplete understanding and hindering their overall academic progress․ This can manifest as missed deadlines, incomplete projects, and a lack of mastery of fundamental skills․ Furthermore, the inability to follow instructions can create a pattern of poor work habits that extends beyond the classroom, impacting future academic pursuits and professional endeavors․ The consequences of this behavior can be far-reaching, affecting not only immediate grades but also long-term personal and professional growth․ Effective learning hinges on the ability to understand and act upon given instructions, making compliance a critical component of successful academic development․ Therefore, fostering a strong understanding of the importance of following instructions is crucial for educators to facilitate optimal learning experiences for their students․

Consequences in Academic Performance

Academic performance suffers significantly when students consistently fail to follow instructions․ This can lead to lower grades on assignments and tests, as incomplete or incorrectly completed work will inevitably receive lower marks․ Missed deadlines, a common result of disregarding instructions, often result in penalties further reducing grades․ Beyond individual assignments, the inability to follow instructions can affect participation in class, hindering the student’s ability to fully engage with the learning material and collaborate effectively with peers․ This lack of engagement can lead to a decline in overall understanding of the subject matter․ The cumulative effect of these factors can result in a negative impact on the student’s GPA and overall academic standing․ Furthermore, a pattern of ignoring instructions can signal a lack of responsibility and organizational skills, impacting the student’s ability to succeed in higher-level courses․ Addressing this issue early is crucial for promoting better academic habits and ensuring long-term academic success․

Failure to Follow Instructions⁚ Legal and Safety Implications

Disregarding instructions can have serious legal and safety repercussions, leading to accidents, injuries, and potential lawsuits․

Legal Consequences in the Workplace

Failure to follow workplace instructions can trigger a range of legal consequences․ Depending on the severity and context of the non-compliance, an employee might face disciplinary actions, including written warnings, suspensions, or even termination․ In some cases, particularly those involving safety regulations or contractual obligations, the legal ramifications could extend beyond internal company policies․ For example, neglecting safety protocols that lead to accidents or injuries could expose both the employee and the company to lawsuits, potentially resulting in significant financial penalties and reputational damage․ The legal consequences are further amplified if the non-compliance involves handling sensitive information or violating company policies related to data protection or confidentiality․ Therefore, understanding and adhering to workplace instructions is crucial not only for maintaining a productive work environment but also for avoiding potential legal entanglements and safeguarding against personal liability․

Safety Risks Associated with Non-Compliance

Disregarding instructions, especially in workplaces with inherent hazards, significantly increases safety risks․ Failure to follow established safety procedures can lead to accidents, injuries, and even fatalities․ This is particularly true in industries like manufacturing, construction, and healthcare, where specific protocols are in place to mitigate risks․ Ignoring safety guidelines, such as improper use of equipment or neglecting personal protective equipment (PPE), can result in serious consequences․ The potential for workplace accidents is amplified when employees deviate from established procedures or fail to understand the rationale behind safety protocols․ Furthermore, the lack of compliance can lead to a culture of negligence, impacting the overall safety of the workplace and potentially exposing the company to legal liabilities and financial penalties․ Prioritizing safety and following instructions diligently is paramount for creating a secure and productive work environment․

Dealing with Employees Who Don’t Follow Instructions

Managers must address non-compliance promptly, identifying root causes and implementing effective corrective actions and training to improve performance․

Identifying the Root Cause of Non-Compliance

Investigating the reasons behind an employee’s failure to follow instructions is crucial․ Is it a misunderstanding of the instructions themselves? Perhaps the instructions were unclear, lacked sufficient detail, or were delivered ineffectively․ Consider whether the employee possesses the necessary skills and training to complete the task․ A lack of understanding or inadequate training can lead to non-compliance․ Alternatively, the employee may be facing personal issues or workplace stressors affecting their focus and performance․ A lack of motivation or a feeling of being undervalued can also contribute to deliberate disregard of instructions․ Open communication and observation can help determine if the root cause is a skills gap, a communication breakdown, or a more complex underlying issue․ Addressing the underlying problem is key to resolving the non-compliance and preventing future occurrences․ Through careful investigation, managers can tailor solutions to address the specific needs of the employee and the situation․

Implementing Corrective Actions and Training

Once the root cause of non-compliance is identified, implementing appropriate corrective actions is essential․ This may involve providing additional training to address skill gaps or clarifying instructions to eliminate misunderstandings․ If the issue stems from poor communication, implementing clearer communication protocols and regular check-ins can be beneficial․ For motivational issues, exploring ways to improve employee engagement and job satisfaction may be necessary․ This could involve offering more autonomy, providing constructive feedback, or addressing workplace stressors․ Disciplinary action may be necessary in cases of deliberate insubordination or repeated non-compliance, but should be a last resort․ Consistent reinforcement of expectations and positive feedback for following instructions are crucial․ Regular performance reviews that include feedback on instruction-following can help employees understand their performance and identify areas for improvement․ A supportive and constructive approach will foster a more compliant and productive work environment․

Consequences of Non-Compliance⁚ Beyond the Workplace

Ignoring instructions while driving can lead to accidents; everyday life requires following rules for safety and efficiency․

From medication instructions to assembling furniture, following directions ensures safety and successful outcomes․

Consequences in Driving and Other Everyday Situations

Failure to follow instructions extends beyond the workplace, significantly impacting safety and well-being in various everyday situations․ Driving, for instance, demands strict adherence to traffic laws and instructions․ Ignoring traffic signals, speed limits, or directions from law enforcement can lead to accidents, injuries, hefty fines, vehicle damage, and even legal repercussions such as license suspension or revocation․ The severity of consequences directly correlates with the gravity of the infraction․ Beyond driving, consider assembling furniture․ Incorrectly following assembly instructions can result in an unstable and potentially dangerous product, leading to injury or damage․ Similarly, in medical contexts, neglecting medication instructions or ignoring a doctor’s advice can have severe health implications, sometimes even life-threatening consequences․ Therefore, consistent adherence to instructions is paramount in navigating daily life safely and effectively․

The Importance of Following Instructions in Various Settings

The ability to follow instructions is a fundamental life skill crucial for success and safety across diverse environments․ In professional settings, it fosters efficiency, prevents errors, and ensures project completion․ Clear communication and adherence to guidelines contribute to a productive and harmonious workplace․ Academically, following instructions is paramount for successful learning and achieving academic goals․ Students who diligently follow instructions demonstrate understanding and enhance their learning experience․ In personal life, from cooking to operating machinery, accurately following instructions ensures safety and desired outcomes․ Improperly following instructions can lead to suboptimal results, damage, or even injury․ Therefore, mastering the skill of attentively following instructions is essential for personal growth, professional success, and overall well-being, contributing to a smoother and safer existence in all aspects of life․

pillsbury funfetti cake mix instructions

To prepare a delicious Pillsbury Funfetti cake, follow the instructions on the package. You’ll need 1 box of Pillsbury Funfetti Premium Cake Mix, 1 1/4 cups of water, 1/3 cup of vegetable oil, and 4 egg whites. Combine all ingredients in a large bowl and mix until moistened. Beat with a mixer on medium speed for 2 minutes. Pour the batter into a prepared cake pan and bake for 28-33 minutes, or until a toothpick inserted in the center comes out clean. Allow the cake to cool completely before frosting.

Introduction

Pillsbury Funfetti cake mix is a beloved staple in many kitchens, offering a simple and delicious way to create a festive and celebratory dessert. This iconic mix is known for its classic white cake base infused with colorful sprinkles, bringing a touch of whimsy and joy to any occasion. Whether you’re baking a birthday cake, cupcakes for a party, or simply craving a sweet treat, Pillsbury Funfetti cake mix provides a convenient and flavorful starting point. This guide will delve into the world of Pillsbury Funfetti cake mix, providing a comprehensive overview of its ingredients, preparation directions, baking instructions, and more. We’ll explore tips for troubleshooting common baking issues, variations to customize your cake, and even delve into the history and availability of this popular cake mix.

Ingredients

Pillsbury Funfetti Premium Cake Mix typically contains a blend of ingredients designed to create a moist and flavorful cake. The primary ingredients include enriched bleached flour (wheat flour, niacin, iron, thiamin mononitrate, riboflavin, folic acid), sugar, candy bits (sugar, corn starch, vegetable oil (palm and palm kernel), soy lecithin, confectioners glaze, red 40 lake, yellow 5 lake, natural and artificial flavor, blue 1 lake, carnauba wax, yellow 6 lake), leavening (baking soda, monocalcium phosphate, sodium aluminum phosphate), salt, and artificial flavor. The candy bits, also known as sprinkles, are the defining characteristic of Funfetti cake mix, adding a vibrant and festive touch to the cake. These ingredients are carefully formulated to create a balanced flavor profile and a consistent texture, making it easy for home bakers to achieve successful results.

Preparation Directions

The preparation of Pillsbury Funfetti cake mix is remarkably straightforward. Start by preheating your oven to 350 degrees Fahrenheit (175 degrees Celsius). Then, lightly grease and flour a 9×13 inch baking pan or prepare a bundt pan using baking spray. Alternatively, if making cupcakes, line a muffin tin with paper baking cups. Next, gather the necessary ingredients⁚ one box of Pillsbury Funfetti Premium Cake Mix, 1 1/4 cups of water, 1/3 cup of vegetable oil, and 4 egg whites. In a large bowl, combine the cake mix, water, oil, and egg whites. Use an electric mixer on medium speed to blend the ingredients until they are thoroughly combined and the batter is smooth. The batter should have a consistent texture and a vibrant, light yellow color.

Baking Instructions

Once the batter is prepared, pour it into the greased and floured baking pan or bundt pan. If using a 9×13 inch baking pan, spread the batter evenly across the bottom. For cupcakes, divide the batter evenly among the prepared muffin cups, filling each cup about two-thirds full. Place the pan(s) in the preheated oven and bake for 28-33 minutes for a 9×13 inch cake, or 19-23 minutes for cupcakes. The baking time may vary slightly depending on your oven, so it’s essential to check for doneness using the toothpick method. Insert a toothpick into the center of the cake; if it comes out clean, the cake is done. If the toothpick has batter attached, bake for a few more minutes and check again. Once the cake is baked, remove it from the oven and let it cool in the pan for 10-15 minutes before transferring it to a wire rack to cool completely. This allows the cake to set and prevents it from sticking to the pan. Cooling the cake completely is crucial before frosting, as it ensures a smooth and even frosting application.

Troubleshooting

While baking a Pillsbury Funfetti cake is generally straightforward, you might encounter some issues along the way. If your cake is too dense or crumbly, it could be due to overmixing. Overmixing the batter develops too much gluten, leading to a tough texture. To avoid this, mix the batter just until the ingredients are combined. If your cake is underbaked, it will be soft and gooey in the center. To fix this, bake it for a few more minutes, checking with a toothpick until it comes out clean. If your cake is overbaked, it will be dry and cracked. To prevent overbaking, keep a close eye on the baking time and check for doneness with a toothpick. If your cake doesn’t rise properly, it could be due to a few factors. Ensure the baking powder is fresh and hasn’t expired. Also, check that you haven’t overmixed the batter, as this can hinder rising. If the cake is too flat, it may be due to a lack of leavening agents. Double-check the recipe and ensure you’ve added the correct amount of baking powder.

Variations

While the classic Pillsbury Funfetti cake mix is delightful, there are plenty of ways to customize it and create unique variations. For a richer flavor, you can add a teaspoon of vanilla extract or a tablespoon of melted butter to the batter. For a fun twist, try incorporating a splash of almond extract or a spoonful of lemon zest. To add a touch of decadence, fold in a cup of chocolate chips or chopped nuts. If you’re feeling adventurous, you can try substituting the water with milk, buttermilk, or even a flavored yogurt for a tangy and moist cake. For a healthier option, you can swap out the oil for applesauce or mashed banana. Don’t be afraid to experiment with different frosting flavors. Try a classic vanilla frosting, a decadent chocolate frosting, or even a vibrant strawberry frosting for a colorful and flavorful addition. For a truly festive touch, consider making a Funfetti cake in a bundt pan or as cupcakes. Decorate with colorful sprinkles, edible flowers, or even a personalized message for a special occasion.

Funfetti Cake Mix Alternatives

While Pillsbury Funfetti is a classic choice, there are other cake mix brands that offer similar funfetti flavors and sprinkles. Duncan Hines Rainbow Confetti Cake mix and Betty Crocker Rainbow Chip Cake mix are popular alternatives. These mixes provide a similar taste and texture to the Pillsbury Funfetti cake, with colorful sprinkles and a moist, fluffy consistency. If you can’t find a specific Funfetti cake mix, you can even use a plain white cake mix or a yellow cake mix. However, you’ll need to add your own sprinkles to achieve the iconic Funfetti look. For a truly homemade version, you can create your own Funfetti cake mix from scratch using basic ingredients like flour, sugar, baking powder, and sprinkles. This allows you to control the sweetness and texture of your cake and customize it with different flavors and sprinkles. The internet is a great resource for finding various homemade Funfetti cake mix recipes that cater to different dietary restrictions and preferences.

Pillsbury Funfetti Cake Mix Nutrition

Pillsbury Funfetti Premium Cake Mix With Candy Bits contains 18.0 grams of sugar per 1/10 package. It also contains 160 calories, 1g of saturated fat, 340mg of sodium, and 18g of sugars. While the mix itself is not gluten-free, Pillsbury offers a gluten-free version of their Funfetti cake mix. The nutritional information for the gluten-free version may vary, so it’s essential to check the package for specific details. It’s important to note that this information refers to the dry cake mix before preparation. The actual nutritional content of the final cake will vary depending on the additional ingredients used, such as oil, eggs, and frosting. If you are concerned about the nutritional content of your Funfetti cake, you can consider using healthier alternatives like unsweetened applesauce instead of oil or using a low-sugar frosting. You can also adjust the amount of sugar added to the cake mix to reduce the overall sugar content.

Pillsbury Funfetti Cake Mix Reviews

Pillsbury Funfetti Cake Mix has received generally positive reviews from customers, with many praising its nostalgic flavor and ease of use. Some reviewers have expressed their satisfaction with the gluten-free version, noting that it tastes just as good as the original. However, a few customers have mentioned that the texture of the cake can be a bit dry, especially when using the gluten-free mix. There are also some mixed opinions regarding the frosting that comes with the Funfetti cake mix. Some find it delicious and perfect for the cake, while others prefer to use a different frosting altogether. The overall consensus is that Pillsbury Funfetti Cake Mix offers a convenient and satisfying option for those looking to create a classic Funfetti cake. However, it’s essential to keep in mind that individual preferences can vary, and some may find the taste or texture to be lacking compared to homemade versions.

Pillsbury Funfetti Cake Mix History

Pillsbury Funfetti Cake Mix, with its iconic colorful sprinkles, has a rich history that dates back to 1989. It was during this year that Pillsbury introduced the cake mix, revolutionizing the way people celebrated birthdays and special occasions. The simple white cake base infused with colorful sprinkles quickly gained popularity, becoming a beloved choice for both kids and adults. The Funfetti cake mix has spawned countless homemade recipes, from cakes to fudge to Rice Krispies treats, showcasing its versatility and adaptability. This iconic cake mix has become synonymous with birthday celebrations and has left an enduring mark on American baking culture. Its simple yet delightful flavor profile and the fun, festive sprinkles have made it a timeless classic that continues to be enjoyed by generations.

Pillsbury Funfetti Cake Mix Uses

Pillsbury Funfetti Cake Mix is a versatile ingredient that can be used in a variety of ways, beyond just baking a classic cake. Its sweet and celebratory flavor profile makes it a perfect base for various desserts and treats. You can use it to make cupcakes, layer cakes, cookies, brownies, and even pancakes. The colorful sprinkles add a fun and festive touch to any recipe. The mix can be used to create delicious desserts for birthdays, holidays, or simply as a delightful treat for any occasion. Its ease of use and adaptability make it a popular choice for both novice and experienced bakers. Whether you’re looking to create a simple dessert or experiment with new recipes, Pillsbury Funfetti Cake Mix is a versatile and enjoyable ingredient to have on hand.

Pillsbury Funfetti Cake Mix Availability

Pillsbury Funfetti Cake Mix is widely available in most major grocery stores across the United States and Canada. It can be found in the baking aisle alongside other cake mixes and baking ingredients. Additionally, you can purchase it online from various retailers, including Amazon, Walmart, and Target. You can also find the mix at grocery delivery services like Instacart, allowing you to conveniently order it directly to your home. The mix is typically available in both regular and gluten-free varieties, catering to diverse dietary needs. Whether you’re shopping in-store or online, you’re likely to find Pillsbury Funfetti Cake Mix readily available for your baking needs. Its popularity and widespread availability make it a convenient choice for any baking project.

Pillsbury Funfetti Cake Mix is a staple in many kitchens, offering a simple and delicious way to create a festive treat. Its easy-to-follow instructions and iconic colorful sprinkles make it a favorite for both novice and experienced bakers. Whether you’re celebrating a birthday, a holiday, or simply craving a sweet indulgence, Pillsbury Funfetti Cake Mix provides a convenient and flavorful foundation for your culinary creations. From cupcakes to cakes to even creative variations, this cake mix offers endless possibilities for delicious desserts. Its widespread availability and consistent quality ensure that you can always enjoy the fun and celebratory taste of Funfetti, making it a versatile and reliable option for any baking occasion.

ore ida fries air fryer instructions

Ore-Ida Fries in an Air Fryer⁚ A Step-by-Step Guide

Achieve perfectly crispy Ore-Ida fries using your air fryer! Preheat to 400°F (200°C)․ Arrange frozen fries in a single layer, ensuring even cooking․ Cook for 8-12 minutes, shaking halfway, until golden brown and crispy․ Enjoy immediately!

Step 1⁚ Preheat and Prepare

Before embarking on your crispy fry journey, begin by preheating your air fryer to the optimal temperature of 400°F (200°C)․ This crucial step ensures even cooking and prevents soggy fries․ Allow the air fryer to preheat for approximately 2-5 minutes, depending on your model․ While the air fryer is heating, prepare your Ore-Ida fries․ If using a larger air fryer, you might need to cook the fries in batches to ensure they are not overcrowded․ Overcrowding can lead to uneven cooking and less crispy results․ For optimal crispiness, consider lightly spraying the fries with cooking spray or brushing them with a small amount of olive oil before placing them in the air fryer basket․ This step is optional but can enhance the final texture․ Remember, the goal is to achieve that perfect balance of crispy exterior and fluffy interior․ Ensure your air fryer basket is clean and free of any debris to ensure the best cooking performance․

Step 2⁚ Adding the Fries to the Basket

Once your air fryer is preheated to the perfect 400°F (200°C), carefully remove the air fryer basket․ Gently add your frozen Ore-Ida fries to the basket, ensuring they are arranged in a single, even layer․ Avoid overcrowding the basket; this can lead to uneven cooking and less crispy results․ If you have a large quantity of fries, you may need to cook them in batches․ Working in batches ensures that each fry receives adequate air circulation for optimal crispiness․ Do not add more fries than recommended for your particular air fryer model; this is crucial for achieving the desired texture․ If you lightly oiled or sprayed your fries in the previous step, ensure they are evenly coated to maximize their crispiness․ Once the fries are neatly arranged, carefully slide the basket back into the air fryer, ensuring it is securely in place․ Now you’re ready to move on to the next step, where you’ll set the timer and begin the cooking process․ Remember, patience and attention to detail will result in perfectly cooked Ore-Ida fries․

Step 3⁚ Cooking Time and Temperature

With the fries nestled in the air fryer basket, set the timer for 8-12 minutes․ The precise cooking time depends on your air fryer model and the amount of fries you’re cooking․ Start with the shorter end of the range (8 minutes) and check for doneness․ A good indicator of readiness is a golden-brown color and a crispy exterior․ If the fries aren’t quite done after 8 minutes, add 2-minute increments until they reach your desired level of crispness․ Remember that overcrowding the basket can significantly increase cooking time and lead to uneven results․ It’s essential to shake or gently toss the fries halfway through the cooking process to ensure even browning on all sides․ This simple step prevents sticking and promotes even heat distribution․ Avoid opening the air fryer too frequently during cooking; this can also cause uneven cooking and reduce the overall crispiness of the fries․ Once the timer goes off, carefully remove the basket and enjoy your perfectly air-fried Ore-Ida fries! Remember to always exercise caution when handling hot air fryer baskets․

Tips and Tricks for Perfect Air Fryer Fries

For optimal results, ensure even fry distribution in the basket and avoid overcrowding․ A light spray of oil may enhance crispiness, but it’s not essential with Ore-Ida fries․ Experiment with seasonings for extra flavor!

Achieving Optimal Crispiness

The key to achieving perfectly crispy Ore-Ida fries in your air fryer lies in a few simple techniques․ First, ensure your air fryer is preheated to the recommended temperature of 400°F (200°C)․ This ensures even cooking from the start, preventing soggy fries․ Arrange the frozen fries in a single layer within the air fryer basket; avoid overcrowding, as this can lead to steaming instead of crispiness․ Overcrowding restricts air circulation, a crucial element in the air frying process․ A light spray of cooking oil or a brush of olive oil can further enhance the crispiness, though many find Ore-Ida fries crisp enough without added oil due to the pre-existing oil content․ Finally, shaking or flipping the fries halfway through the cooking process helps to ensure even browning and prevents sticking․ By following these steps, you can consistently achieve that satisfyingly crunchy texture that makes air-fried Ore-Ida fries a delightful treat․

Experimenting with Cooking Times

While the recommended cooking time for Ore-Ida fries in an air fryer is typically between 8 and 12 minutes, achieving the perfect crispiness often requires some experimentation․ Factors such as the specific air fryer model, its wattage, and even the batch size of fries can influence the ideal cooking time․ Start by checking your fries at the lower end of the recommended time range (8 minutes)․ If they aren’t yet golden brown and crispy, continue cooking in 1-2 minute increments, checking frequently to avoid burning․ Remember, overcooked fries can become dry and hard, while undercooked ones will be soft and lack that satisfying crunch; The ideal texture is a balance of crispy exterior and fluffy interior․ Don’t be afraid to adjust cooking times slightly based on your preferences and the specific characteristics of your air fryer․ Through trial and error, you’ll find the perfect cooking time to consistently produce your ideal batch of crispy Ore-Ida fries․

Adding Flavor and Seasoning

Elevate your air-fried Ore-Ida fries beyond the standard salty goodness by experimenting with various seasonings and flavor combinations․ Before air frying, toss the fries with your chosen seasoning blend․ A simple sprinkle of garlic powder, onion powder, and paprika adds savory depth․ For a spicier kick, incorporate cayenne pepper or chili powder․ Experiment with herbs like rosemary or thyme for an earthy twist․ Consider adding a touch of your favorite spice blend, such as Italian seasoning or Cajun seasoning, for a more complex flavor profile․ For extra flavor, try a light coating of olive oil or cooking spray before seasoning, ensuring even distribution․ Remember that the seasonings will adhere better to slightly oiled fries․ After cooking, you can further enhance the flavor by adding a sprinkle of fresh herbs, such as parsley or chives, or a drizzle of your favorite sauce, like aioli or sriracha mayo․ Don’t be afraid to get creative and discover your unique flavor combinations for perfectly seasoned, delicious air-fried Ore-Ida fries․

Serving Suggestions and Variations

Serve your crispy Ore-Ida fries with classic dipping sauces like ketchup, mayonnaise, or ranch dressing․ Explore creative options⁚ aioli, sriracha mayo, or even a flavorful cheese sauce!

Dipping Sauces and Sides

Elevate your air fryer Ore-Ida fries experience with a delightful array of dipping sauces and complementary sides․ Classic choices like ketchup and mayonnaise remain timeless favorites, offering a familiar and satisfying contrast to the crispy fries․ For a tangier kick, consider a zesty chipotle mayo or a creamy sriracha aioli, adding a spicy twist to the traditional pairing․ Ranch dressing, with its herbaceous and slightly creamy notes, provides another excellent option, balancing the saltiness of the fries perfectly․

Beyond the realm of dips, explore exciting side dishes to complement your perfectly air-fried Ore-Ida fries․ A simple side salad with a light vinaigrette can provide a refreshing counterpoint to the richness of the fries, creating a balanced and wholesome meal․ Alternatively, consider serving your fries alongside a juicy burger or a flavorful grilled chicken sandwich, transforming them into a hearty and satisfying centerpiece of your meal․ For a truly indulgent experience, add a scoop of creamy vanilla ice cream to your plate of fries, creating a surprisingly delicious sweet and savory combination that’s sure to impress․

Creative Recipe Adaptations

Transform your simple air-fryer Ore-Ida fries into culinary masterpieces with exciting recipe adaptations․ Infuse bold flavors by tossing the fries with your favorite seasonings before air frying․ Cajun spices, smoky paprika, or a blend of garlic powder, onion powder, and herbs can create uniquely delicious variations․ For a cheesy indulgence, sprinkle shredded cheddar, parmesan, or mozzarella over the fries during the last few minutes of cooking, allowing the cheese to melt and become delightfully gooey․

Elevate your fries with gourmet toppings․ After air frying, drizzle a flavorful sauce such as truffle oil, garlic aioli, or spicy buffalo wing sauce for an extra layer of taste․ Consider adding fresh herbs like parsley or chives for a vibrant touch․ Get creative with additions like crumbled bacon bits, chopped green onions, or even a sprinkle of everything bagel seasoning․ Don’t hesitate to experiment with different spice blends, cheeses, and fresh ingredients to personalize your Ore-Ida fries and create unique flavor combinations that suit your preferences․ The possibilities are endless!

potato bag instructions

Potato Bag Instructions⁚ A Step-by-Step Guide

Growing potatoes in bags is a convenient and space-saving way to grow your own delicious spuds. Whether you have limited garden space or simply want to try something different, this step-by-step guide will walk you through the process of successfully planting potatoes in bags. From understanding the basics of potato planting to caring for your potato plants, we’ve got you covered.

Introduction

Planting potatoes in bags is a convenient and space-saving way to grow your own delicious spuds. Whether you have limited garden space or simply want to try something different, this step-by-step guide will walk you through the process of successfully planting potatoes in bags. From understanding the basics of potato planting to caring for your potato plants, we’ve got you covered.

Before diving into the details of bag planting, it’s essential to have a basic understanding of how potatoes grow. Potatoes belong to the nightshade family and are starchy tubers that develop underground. The process begins with seed potatoes, which are potatoes saved specifically for planting. When these seed potatoes are planted, they grow into new potato plants through a process called chitting.

Chitting is a crucial step in the life cycle of a potato plant. It involves placing the seed potatoes in a cool, well-lit area to encourage the growth of sprouts. These sprouts, also known as chits, emerge from the eyes of the potato. Chitting helps to jumpstart the growth process and ensures that the potato plants have a head start when they are eventually planted in the soil.

Once the chits have emerged and are around 1-2 inches long, the seed potatoes are ready for planting. It is important to choose healthy seed potatoes with no signs of disease or rot. Planting them in well-drained soil with good fertility is essential for their growth and development.

Benefits of Potato Bag Planting

Bag planting offers numerous benefits for growing potatoes. One major advantage is that it allows you to grow potatoes in a small space such as a balcony, patio, or even indoors. This is particularly beneficial for urban gardeners or those with limited gardening space. By using bags, you can maximize your potato yield without the need for a large garden.

In addition to space-saving benefits, bag planting provides excellent drainage for potato plants. The bags are typically made of breathable material that allows excess water to drain out, preventing waterlogged soil. This is crucial because potatoes require well-drained soil to thrive. Waterlogged soil can lead to root rot and other diseases that can harm the plants.

Another advantage of bag planting is that it simplifies the process of controlling weeds. When growing potatoes in the ground, weeds can quickly take over and compete with the potato plants for nutrients and water. However, when using bags, it is easier to keep the area weed-free. The confined space makes it easier to spot and remove any weeds that may emerge.

Bag planting also allows for better monitoring and management of pests. By keeping the potato plants in bags, you can easily inspect them for any signs of insect damage or disease. If pests are detected, you can take immediate action to prevent further infestation and protect your potato crop.

Moreover, bag planting simplifies the process of harvesting. When growing potatoes in the ground, harvesting involves digging up the plants, which can be labor-intensive and time-consuming. However, with bag planting, all you need to do is empty the bags to harvest your potatoes. This makes the harvesting process much more convenient and saves you from the back-breaking work of digging.

In conclusion, bag planting offers a convenient and space-saving method for growing potatoes. It provides excellent drainage, simplifies weed control, allows for better pest management, and makes harvesting a breeze. Whether you have a small balcony or a large garden, bag planting is a practical and efficient way to enjoy a bountiful potato harvest.

Getting Started⁚ Supplies and Preparation

Before getting started with bag planting, it’s important to gather all the necessary supplies. By having everything ready, you can ensure a smooth planting process.

The first step in gathering supplies is selecting the right potato varieties to plant. Certain potato varieties are better suited for bag planting due to their size and growth characteristics. Look for varieties that are labeled as suitable for container or bag planting. These varieties often produce more compact plants and tend to have a shorter growing season.

Next, you’ll need to choose suitable planting bags. Opt for bags specifically designed for growing potatoes, as they are typically made from a breathable fabric that allows proper airflow. These bags should also be large enough to accommodate the growth of the potato plants and provide ample space for the tubers to develop.

Finally, gather the essential tools for potato planting. You’ll need a garden trowel or shovel for filling the bags with soil, a sharp knife for cutting the seed potatoes, and a watering can or hose for irrigation.

Once you have all your supplies ready, it’s time to prepare your potatoes for planting. Proper preparation ensures that your potatoes have the best chance of thriving in the bags.

Before planting, chitting the seed potatoes is crucial to promote sprout growth; To chit your potatoes, place them in a cool, well-lit area with the eyes facing upwards. The eyes are the small depressions on the surface of the potato from which sprouts emerge. Allow the potatoes to chit for a few weeks until sprouts about 1 inch long have developed.

Once the potatoes have chitted, it’s time to cut them into smaller pieces for planting. Each piece should have at least one or two sprouts. Use a clean, sharp knife to cut the potatoes, ensuring that each piece is approximately 2 inches in size.

Chitting and Cutting Seed Potatoes

Once you have all your supplies ready, it’s time to prepare your potatoes for planting. Proper preparation ensures that your potatoes have the best chance of thriving in the bags.

Before planting, chitting the seed potatoes is crucial to promote sprout growth. To chit your potatoes, place them in a cool, well-lit area with the eyes facing upwards. The eyes are the small depressions on the surface of the potato from which sprouts emerge. Allow the potatoes to chit for a few weeks until sprouts about 1 inch long have developed.

Chitting is a crucial step in the life cycle of a potato plant. It involves placing the seed potatoes in a cool, well-lit area to encourage the growth of sprouts. These sprouts, also known as chits, emerge from the eyes of the potato. Chitting helps to jumpstart the growth process and ensures that the potato plants have a head start when they are eventually planted in the soil.

Once the potatoes have chitted, it’s time to cut them into smaller pieces for planting. Each piece should have at least one or two sprouts. Use a clean, sharp knife to cut the potatoes, ensuring that each piece is approximately 2 inches in size. This process is called cutting or dividing the seed potatoes. Cutting the potatoes into smaller pieces allows for more planting points, resulting in a larger yield of potatoes. It is important to ensure that each piece has at least one healthy sprout to ensure successful growth.

When cutting the potatoes, make sure to use a sharp knife to avoid bruising the potatoes. Bruised potatoes are more susceptible to disease and may not grow as well. Additionally, it’s important to cut the potatoes in a way that allows for proper airflow and drainage. This helps to prevent rot and promotes healthy growth.

With your potatoes prepared, it’s time to tackle the actual planting process. Follow these steps to ensure successful bag planting.

Planting Potatoes in Bags

Begin by partially filling the planting bags with a nutrient-rich potting soil. Fill the bags up to about one-third of their capacity. Ensure that the soil is loose and well-draining to prevent waterlogging. This is essential for potato growth, as they require well-drained soil to thrive. Waterlogged soil can lead to root rot and other diseases that can harm the plants.

Next, position the seed potatoes on top of the soil surface in the bags. Make sure they are evenly spaced and have the sprouts facing upwards. Space the potatoes approximately 6-8 inches apart from each other to provide sufficient room for growth; This spacing allows for adequate air circulation and prevents overcrowding, which can hinder the development of healthy tubers.

Once the potatoes are in place, cover them with an additional layer of soil. This layer should be about 4-6 inches deep. Gently water the bags until the soil is evenly moist, but not waterlogged. It’s important to maintain consistent moisture throughout the growing season to avoid dry or waterlogged conditions. Potatoes require regular watering, especially during dry periods. However, overwatering can lead to root rot, so it’s important to strike a balance.

After planting, place the bags in a sunny location that receives at least 6 hours of direct sunlight per day. This will ensure that the potato plants have enough energy to grow and produce tubers. The bags can be placed on a patio, balcony, or even indoors near a sunny window. It’s important to rotate the bags regularly to ensure that all sides receive adequate sunlight. This helps to promote even growth and development.

As the potato plants grow, you will need to “hill” them. This involves adding more soil to the bags as the plants grow taller. The goal is to cover the stems of the plants with soil, leaving only the top few leaves exposed. This encourages the development of more tubers along the stems. Hill the plants every few weeks, adding more soil to the bags as needed.

Planting potatoes in bags is a convenient and space-saving way to grow your own delicious spuds. Whether you have limited garden space or simply want to try something different, this step-by-step guide will walk you through the process of successfully planting potatoes in bags.

Caring for Your Potato Plants

Watering is crucial for potato plants, especially during dry periods. Monitor the moisture levels in the bags and water when the top layer of soil feels dry to the touch. Avoid overwatering, as excessive moisture can lead to rot and disease. It’s best to water deeply but infrequently, ensuring that the water reaches the plants root zone. Regularly check the soil moisture by inserting your finger into the soil. If it feels dry, it’s time to water. Water thoroughly until the water drains out from the bottom of the bags.

Potato plants are susceptible to various pests that can cause damage to the foliage and tubers. Common pests include potato beetles, aphids, and caterpillars. Regularly inspect your plants for signs of infestation, such as chewed leaves or visible pests. If pests are present, consider using organic pest control methods or consult with a local gardening expert for the best course of action. Organic pest control methods include using insecticidal soap, neem oil, or diatomaceous earth. You can also handpick pests off the plants and remove them.

Fertilizing is also important for healthy potato growth. Use a balanced fertilizer, such as a 10-10-10, every 2-3 weeks. This will provide the plants with the nutrients they need to thrive. However, be careful not to overfertilize, as this can damage the plants. Follow the instructions on the fertilizer package carefully. You can also use organic fertilizer options like compost, manure, or fish emulsion. These provide essential nutrients to the plants and improve soil health.

As the potato plants grow, they will need to be “hilled.” This involves adding more soil to the bags as the plants grow taller. The goal is to cover the stems of the plants with soil, leaving only the top few leaves exposed. This encourages the development of more tubers along the stems. Hill the plants every few weeks, adding more soil to the bags as needed. You can use a trowel or shovel to add soil to the bags. Make sure to add the soil gently so as not to damage the plants.

With proper care and attention, your potato plants will thrive in their bags and produce a bountiful harvest of delicious potatoes.

Harvesting Your Potatoes

Harvesting your potatoes is a rewarding moment after all your hard work. Knowing when to harvest is key to getting the most delicious and flavorful potatoes. The time to harvest depends on the variety of potatoes you planted and the length of your growing season. For most potato varieties, you can expect to harvest them about 70 to 120 days after planting.

Keep an eye on your potato plants. When the leaves start to turn yellow and brown, and the stems begin to wilt, it’s a good indication that the potatoes are ready for harvesting. You can also gently test the soil around the plants. If the soil feels firm and hard, it’s likely the potatoes are ready. You can also gently dig up a few potatoes to check their size and maturity. If they are the size and shape you desire, they’re ready to harvest.

Harvesting potatoes grown in bags is relatively simple. Carefully tip the bag on its side and gently empty the contents onto a tarp or large sheet; Avoid shaking or jostling the bag too much, as this could damage the potatoes. Once the potatoes are out of the bag, you can start picking them out. Potatoes will be in different sizes, and you can separate them based on size and use as needed.

Gently sift through the soil to find all the potatoes. Use your hands to remove any excess soil from the potatoes. You can also use a brush to gently remove dirt. Be careful not to damage the potatoes. Store your potatoes in a cool, dark, and dry place. This will help them stay fresh for longer. Avoid storing them in direct sunlight or in a humid environment, as this can cause them to spoil.

With a little patience and care, you can enjoy the fruits of your labor ― a delicious harvest of homegrown potatoes. Remember to save some of the potatoes for planting next year’s crop. Enjoy your fresh, homegrown potatoes in your favorite recipes.

Growing potatoes in bags is a fantastic way to enjoy fresh, homegrown potatoes even if you have limited space. It’s a rewarding experience, and you can enjoy the satisfaction of harvesting your own delicious potatoes. With a little planning and care, you can have a successful potato harvest right in your own backyard, on your patio, or even on your balcony.

Remember, the key to success is starting with healthy seed potatoes, providing them with well-drained soil, and giving them the right amount of water and sunlight. Keep a close eye on your plants for any signs of pests or disease, and take action promptly if you notice any issues.

Once your potatoes are harvested, enjoy the fruits of your labor! Use them in your favorite recipes, share them with friends and family, or simply savor the taste of fresh, homegrown potatoes. Growing potatoes in bags is a great way to connect with nature, learn about gardening, and enjoy the benefits of fresh, healthy food.

If you’re new to gardening, don’t be afraid to try growing potatoes in bags. It’s a relatively simple process, and the rewards are well worth the effort. Happy gardening!

Remember, this is just the beginning of your potato-growing journey. As you gain experience, you can experiment with different potato varieties, try different growing methods, and explore new ways to enjoy your harvest. The possibilities are endless!